Introduction to Image-to-Embroidery Conversion
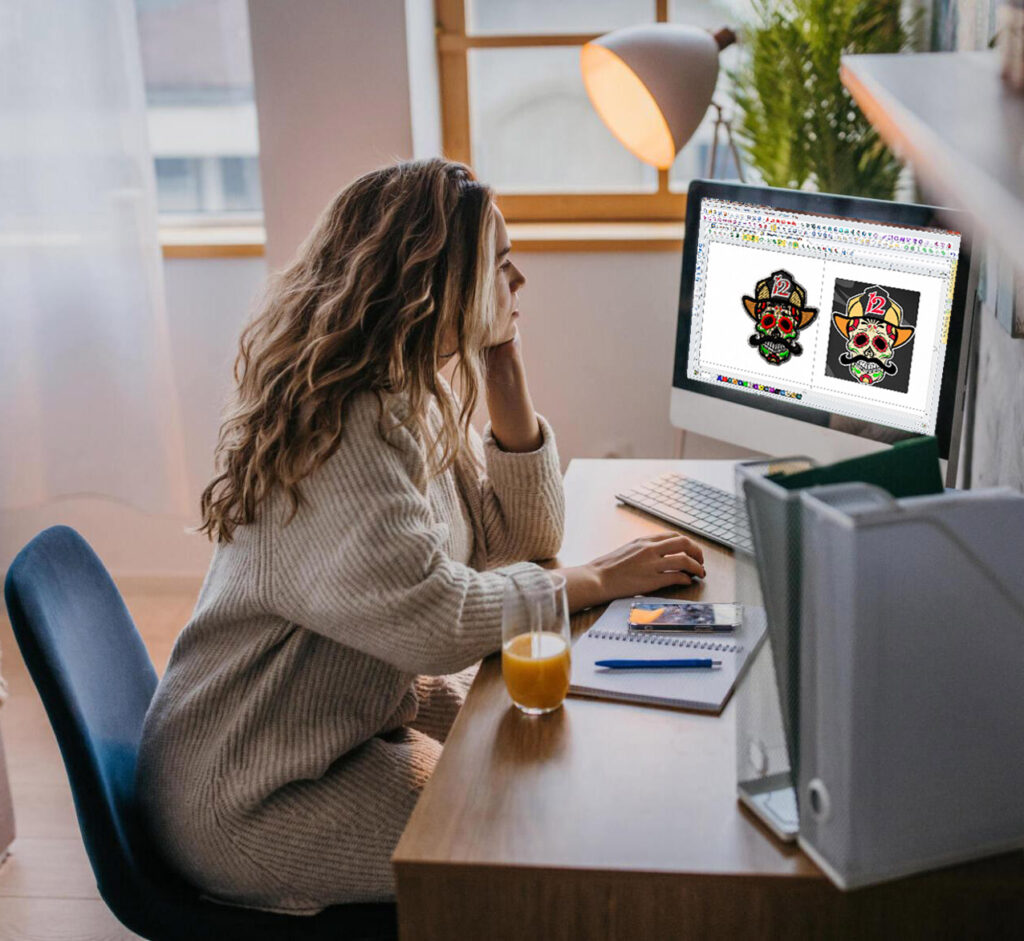
Ever wondered how that crisp company logo or intricate design gets perfectly stitched onto hats and jackets? The magic happens through a process called digitizing, where regular image files like JPGs get transformed into specialized embroidery files like PES format. This conversion is what allows Brother embroidery machines to interpret your designs as stitches rather than pixels.
Unlike simply changing a file extension, converting JPG to PES involves completely reimagining how the image gets reproduced – from flat colors on a screen to textured thread on fabric. It’s this transformation that we’ll explore in detail, giving you the knowledge to either do it yourself or understand what happens when you send your design to a professional digitizer.
Why You Can’t Just Use JPG Files Directly
At first glance, it might seem like your embroidery machine should be able to work with JPG files – after all, they show the design you want, right? But there’s a fundamental difference between how images and embroidery work:
JPG files are raster images made up of thousands of colored pixels arranged in a grid. Your embroidery machine, on the other hand, needs instructions about:
- Where to place each needle penetration
- What stitch type to use in each area
- Which thread colors to use and when to change them
- How to move between different sections efficiently
The PES file format (specific to Brother machines) contains all this needle-and-thread information that the JPG simply doesn’t have. That’s why conversion is necessary – it’s about translating visual information into physical stitching instructions.
The Step-by-Step Conversion Process
1. Image Preparation and Optimization
Before any digitizing begins, the JPG needs proper preparation:
- Resolution boost: Enlarging low-res images leads to pixelation. Start with at least 300 DPI at your target size.
- Background removal: Unless you want the background stitched, it should be deleted or made transparent.
- Color reduction: Photos may contain millions of colors, but embroidery typically uses 1-15 thread colors.
- Detail simplification: Small text and intricate details often need enlarging or removing to stitch well.
2. Digitizing Software Conversion
This is where the real magic happens. The software (or professional digitizer) analyzes your prepared image and:
a. Identifies distinct elements
- Outlines/borders
- Solid color areas
- Text components
- Special effects areas
b. Assigns stitch types
- Satin stitches for smooth borders and text
- Fill stitches for large solid areas
- Running stitches for fine details
c. Determines stitch parameters
- Density (stitches per inch)
- Direction (which way stitches run)
- Underlay (foundation stitches)
- Pull compensation (accounting for fabric distortion)
3. Manual Adjustments and Refinements
Auto-digitizing rarely produces perfect results. Skilled digitizers will:
- Clean up jagged edges
- Optimize stitch paths to minimize jumps
- Adjust densities for different fabric types
- Sequence colors logically to reduce thread changes
- Add registration marks for multi-hoop designs
4. Testing and Final Output
Before delivering the final PES file:
- Virtual testing: Software simulates the stitching process
- Actual stitch-out: Sewing a sample reveals real-world issues
- Troubleshooting: Adjusting for puckering, gaps or other problems
- Final export: Saving in PES format with proper machine settings
Key Factors Affecting Conversion Quality
Several elements determine how well your JPG converts to embroidery:
Design Complexity
- Simple logos with clean lines convert best
- Photorealistic images rarely stitch well
- Text smaller than 1/4″ often becomes unreadable
Color Translation
- The software maps JPG colors to available thread palettes
- Gradient effects require creative stitch direction changes
- Metallic or specialty threads may need separate treatment
Size Considerations
- Details that look fine on screen may disappear when stitched small
- Large designs require careful planning for stitch count limits
- Aspect ratio changes can distort the design
Common Conversion Challenges and Solutions
Problem: Design looks pixelated when stitched
Solution: Start with higher resolution JPG, simplify details, or increase embroidery size
Problem: Fabric puckers during stitching
Solution: Reduce stitch density, add proper stabilizer, adjust pull compensation
Problem: Small text becomes unreadable
Solution: Enlarge text, use thicker fonts, or convert to simpler monogram
Problem: Colors don’t match original image
Solution: Manually select thread colors in software before exporting
Choosing Your Conversion Method
You’ve got several options for converting JPG to PES:
Auto-Digitizing Software
- Pros: Fast, inexpensive, good for simple designs
- Cons: Often needs manual cleanup, limited control
- Best for: Hobbyists with basic designs
Manual Digitizing
- Pros: Highest quality results, complete control
- Cons: Steep learning curve, time-intensive
- Best for: Professionals and serious hobbyists
Professional Digitizing Services
- Pros: Expert results, saves time
- Cons: Additional cost, turnaround time
- Best for: Important projects and complex designs
The Importance of Machine Compatibility
While we’re focusing on PES files for Brother machines, it’s worth noting:
- Different machine brands use different formats (DST, EXP, XXX etc.)
- Most digitizing software can output multiple formats
- Always verify which format your specific machine requires
- Some machines have stitch count or hoop size limitations
Preparing for Successful Stitching
Even with a perfect PES file, your results depend on:
- Fabric choice: Stable, tightly woven fabrics work best
- Stabilizer selection: Matched to your fabric weight and stretch
- Hooping technique: Proper tension prevents distortion
- Thread quality: Consistent, high-quality threads run smoother
- Needle condition: Fresh needles prevent skipped stitches
Advanced Conversion Techniques
Once you’ve mastered basics, explore these pro methods:
- Layer blending: Combine stitch types for dimensional effects
- Trapunto: Add padding for 3D raised areas
- Sequins/beads: Incorporate special elements into designs
- Custom stitch patterns: Create unique textures beyond standard fills
The Future of JPG to PES Conversion
Emerging technologies are changing the conversion landscape:
- AI-assisted digitizing for faster, smarter conversions
- Cloud-based services for instant file processing
- Improved auto-digitizing algorithms
- Integrated design-to-stitch mobile apps
Conclusion: From Pixels to Perfect Stitches
Converting JPG to PES is both an art and a science – part technical process, part creative interpretation. While software can automate parts of the process, the best results still come from human expertise that understands how thread behaves differently than pixels.
Whether you choose to learn digitizing yourself or work with professionals, understanding this conversion process helps you create better designs from the start. Remember that every stunning embroidered piece begins with this crucial translation from digital image to stitch instructions.
With practice and patience, you’ll develop an eye for what makes a good embroidery design and how to prepare your JPG files accordingly. Soon you’ll be looking at every image wondering not just “Can I stitch this?” but “How would this look best in thread?” – the true mark of an embroidery enthusiast.


